Installing and configuring the Nginx web server on Centos 6
How to install the Nginx using the Yum Command!
Recently i had install the Nginx Web server so i thought to share to share it with you all.
You can either download it to your repository and install it using rpm command or through the Yum install command its fairly depends on your infrastructure.
Now to lets take a Start.
Step #1 find the location of your repository to download the Rpm mine is located at the following location
# cd /var/ftp/pub/
Setp # 2 find out your operating system information using the command uname -a weather its 32bit or 64bit so that we can download the appropriate rpm for the repository.
# uname -a
output : Linux test.local 2.6.32-358.11.1.el6.x86_64 #1 SMP Wed Jun 12 03:34:52 UTC 2013 x86_64 x86_64 x86_64 GNU/Linux
if you see output as x86_64 then you can presume that you have 64bit os install on your server. or if you see i686 i386 then it an 32bit os install on your machine.
Setp # 3 Download and install RPM using the wget and RPM command
# wget http://nginx.org/packages/rhel/6/noarch/RPMS/nginx-release-rhel-6-0.el6.ngx.noarch.rpm
# rpm -ivh nginx-release-rhel-6-0.el6.ngx.noarch.rpm
Output :
Preparing... ########################################### [100%]
1:nginx-release-centos ########################################### [100%]
Installation using Yum command
Step # 4
# yum install nginx
Output :
[root@test Desktop]# yum install nginx
Loaded plugins: downloadonly, fastestmirror, refresh-packagekit, security
Loading mirror speeds from cached hostfile
* base: centos.hyve.com
* epel: mirrors.coreix.net
* extras: centos.hyve.com
* rpmforge: ftp.heanet.ie
* updates: centos.hyve.com
nginx | 2.9 kB 00:00
nginx/primary_db | 23 kB 00:00
Setting up Install Process
Resolving Dependencies
--> Running transaction check
---> Package nginx.x86_64 0:1.4.1-1.el6.ngx will be installed
--> Finished Dependency Resolution
Dependencies Resolved
=================================================
Package Arch Version Repository Size
==================================================
Installing:
nginx x86_64 1.4.1-1.el6.ngx nginx 311 k
Transaction Summary
==================================================
Install 1 Package(s)
Total download size: 311 k
Installed size: 770 k
Is this ok [y/N]: y
Downloading Packages:
nginx-1.4.1-1.el6.ngx.x86_64.rpm | 311 kB 00:01
Running rpm_check_debug
Running Transaction Test
Transaction Test Succeeded
Running Transaction
Warning: RPMDB altered outside of yum.
Installing : nginx-1.4.1-1.el6.ngx.x86_64 1/1
----------------------------------------------------------------------
Thanks for using NGINX!
Check out our community web site:
* http://nginx.org/en/support.html
If you have questions about commercial support for NGINX please visit:
* http://www.nginx.com/support.html
----------------------------------------------------------------------
Verifying : nginx-1.4.1-1.el6.ngx.x86_64 1/1
Installed:
nginx.x86_64 0:1.4.1-1.el6.ngx
Complete!
Step # 5 turn on the nginx services.
Type the below command to start the serves at the run level
# chkconfig nginx on
Step # 6 We can start / Stop / Restart and Reload or to check the Status the services by using the following commands.
# service nginx start
# service nginx stop
# service nginx restart
# service nginx status
# service nginx reload
Output :
# service nginx start
Starting nginx: [ OK ]
Step # 7 location of Configuration files for nginx.
Default Directory : /etc/nginx/
Default SSL and Vhost cofig directory /etc/nginx/conf.d
Default log file Directory /var/log/nginx/
Default Document root location /usr/share/nginx/html/index.html
Default Configuration file /etc/nginx/nginx.conf
Default Server Access log file /var/log/nginx/access.log
Default Server Access log file /var/log/nginx/error.log
To edit the nginx configuration file
# vim /etc/nginx/nginx.conf
Now we can Set or update the worker_processes as follows (this should be set to CPU(s) in your system.
worker_processes 2;
Turn the gzip support on
gzip on;
Save and Close the file etc/nginx/nginx.conf
Step # 8 Now we can configure the IP address and Also configure the host name to access the Site
Open the file from the below location
# vi /etc/nginx/conf.d/default.conf
Set the Ip at
listen 202.54.1.1.1:80;
Set server name:
server_name abc.local;
Save and Close the File etc/nginx/conf.d/default.conf
Step # 9
Start the Nginx services
# service nginx start
Step # 10
Versification of installation
# netstat -tulpn | grep :80
# ps aux | grep nginx
Firewall Configuration : Open TCP Port # 80
Edit the file /etc/sysconfig/iptables
Vi /etc/sysconfig/iptables
Add the following lines, ensuring that they appear before the final LOG and DROP lines for the INPUT chain to open port 80:
-A INPUT -m state --state NEW -p tcp --dport 80 -j ACCEPT
Save and close the file. Finally, restart the firewall:
# service iptables restart
Step # 11
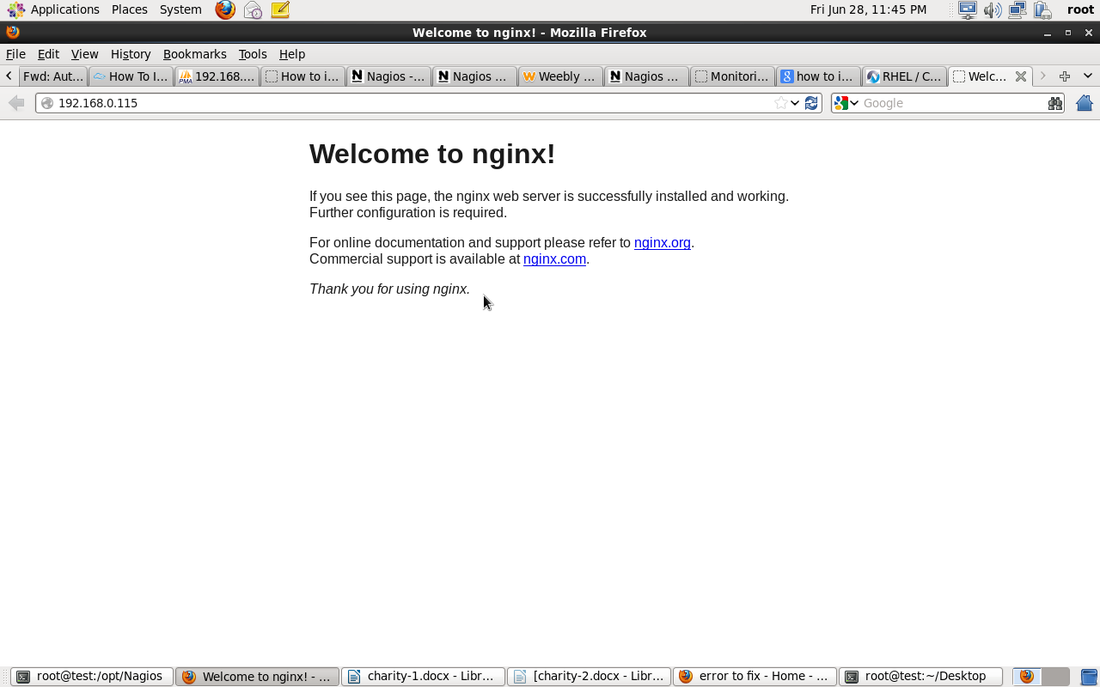
Open browser and test it either by typing the server Ip address or by Host name.
 RSS Feed
